Can We Increase Maximum Number of Partitions Effectively
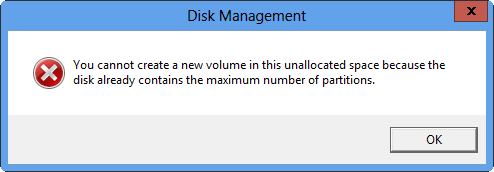
As we know, Windows Disk Management tool can help us to create new partitions when we need. However, sometimes, we may fail to create a new partition. To be specific, I’m planning to create a new partition to store some personal data by using Disk Management tool. Therefore, I shrink one of my partitions to get unallocated space, and then create a new one with it. Nevertheless, I receive a message: “You cannot create a new volume in this unallocated space because the disk already contains the maximum number of partitions”. What’s the reason and how do I fix this issue?
Maximum Number of Partitions
In general, all these are caused by limitations of MBR disk as well as Windows snap-in Disk Management tool. As we know, MBR disk supports up to three primary partitions and one extended partition or four primary partitions.
When there have been three primary partitions and one extended partition, users will not be allowed to create primary partition. Therefore, users cannot create new partition under this situation.
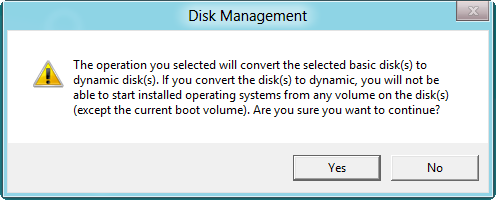
If there have been four primary partitions on MBR disk, users will be prompted to convert their basic disk to dynamic disk when they are creating a new one in unallocated space shrunk from primary partition.
How to Increase Maximum Number of Partitions
Fortunately, third-party partition magic can help users to increase maximum number of partitions quite effectively. Here, you can try using MiniTool Partition Wizard since this app enjoys more than 15 millions downloads. In addition, it is a piece of free partition software which can help to complete partition creation in almost all situations. And, this freeware can help to create partition without bringing any influence on original data because of its high security. More importantly, it provides wizard-based operation and simple interface.
How to Create Partition When There Are 3 Primary Partitions and 1 Extended Partition Already
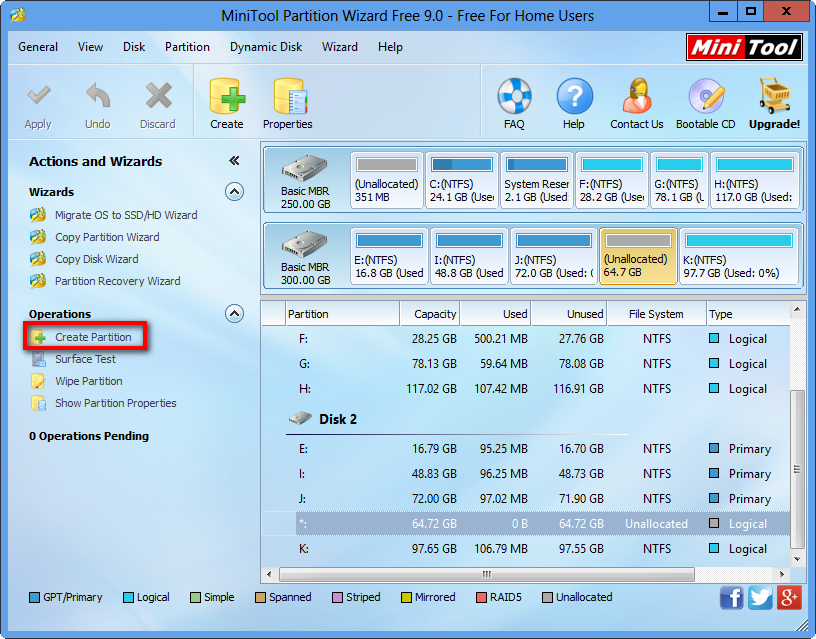
Firstly, launch MiniTool Partition Wizard to get its main interface. (Note: Here, we will show how to increase maximum number of partitions under Windows 8.)

Now, select the unallocated space and then click “Create Partition”. After that, you will see the following interface.

This interface shows the new partition is set as logical. At this time, you should set other parameters including partition label, drive letter, and file system and so on. After that, click “OK” to go back to the main interface.
Finally, tap “Apply” in tool bar to confirm changes.
Note: you are not allowed to create a logical partition between 2 primary partitions via this professional freeware. Under this situation, you can turn to the “Move/Resize Partition” to change the position between primary partition and unallocated space.
How to Create Partitions When There Have Been 4 Primary Partitions
Firstly, launch MiniTool Partition Wizard to get its main interface. (Note: Here, we will show how to increase maximum number of partitions under Windows 7.)

Secondly, select a partition and then click “Set Partition as Logical”.
Thirdly, select the unallocated space and then click “Create Partition”. (Note: if there is no unallocated space on the same disk, you should shrink a partition to release some free space first.)
Fourthly, configure parameters for new partition, and then click “OK” button to go back to the main interface of this software.
Finally, click “Apply” button to execute all changes.
If you encounter the same situation and also do not know how to create a new partition, you can try using MiniTool Partition Wizard. It can help to perfectly increase maximum number of partitions under Windows without affecting the original data.